
Step‑by‑Step Instructions for Creating an NC Hay Finder Account
-
1
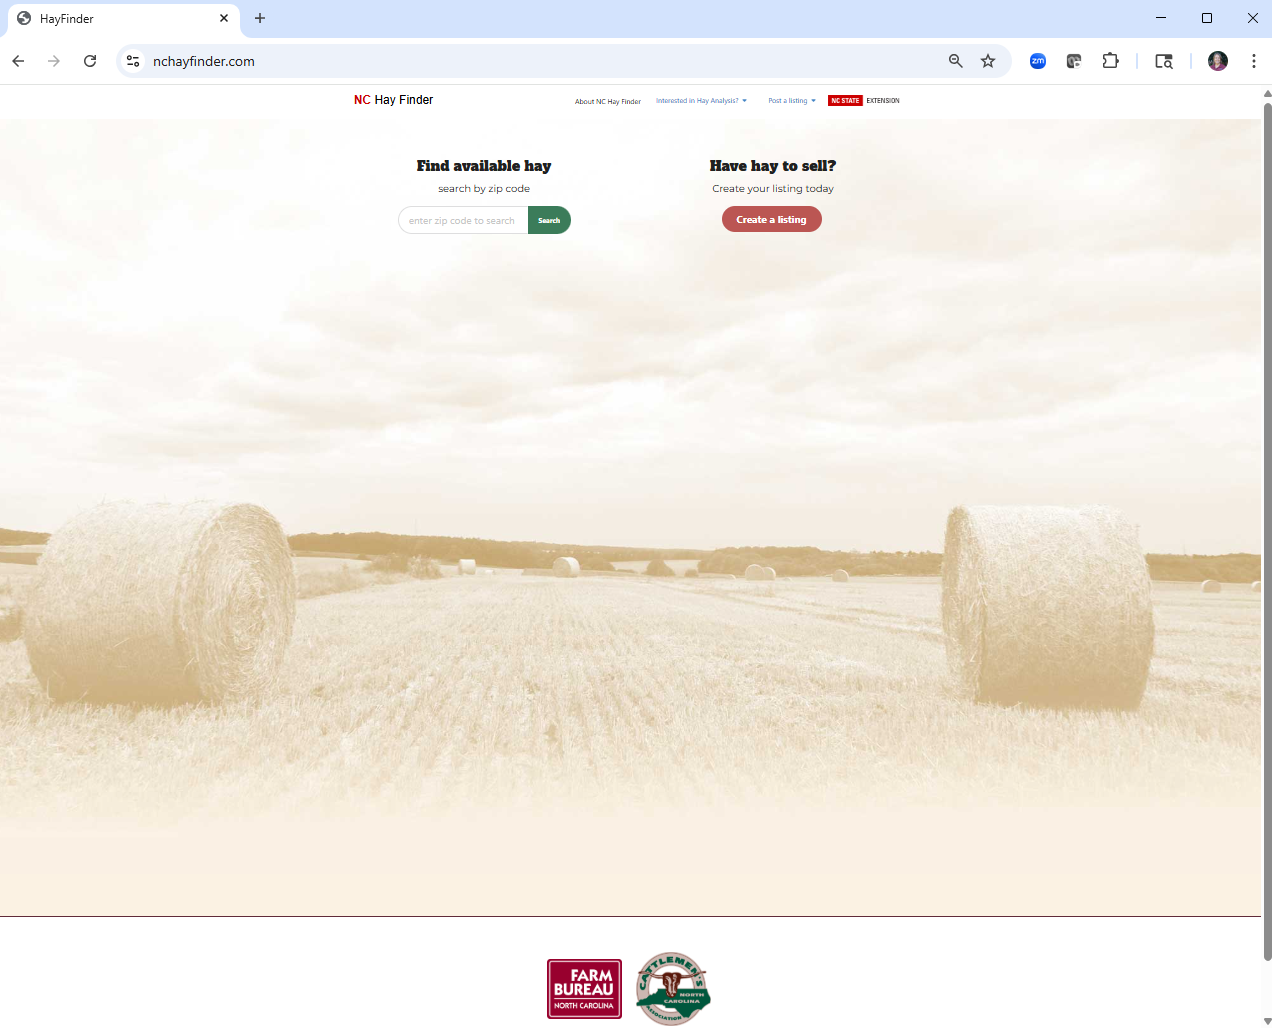
Go to https://www.nchayfinder.com/
-
2
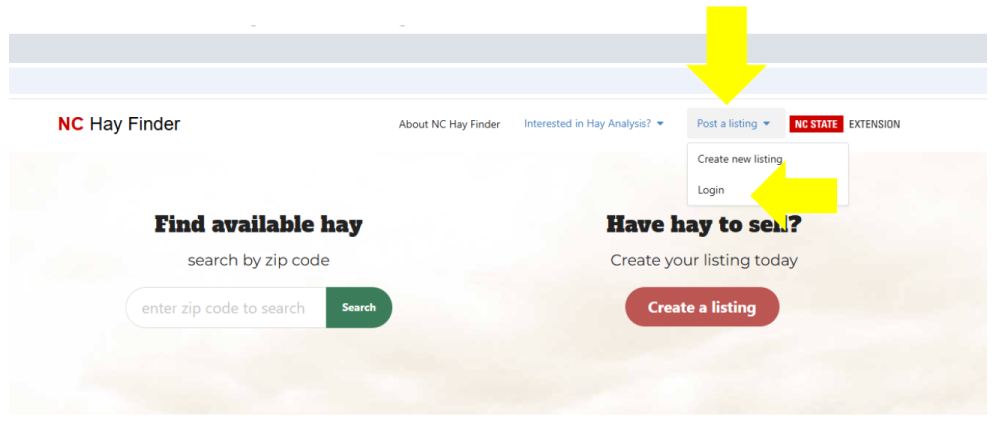
Click Post a listing, then click Login
-
3
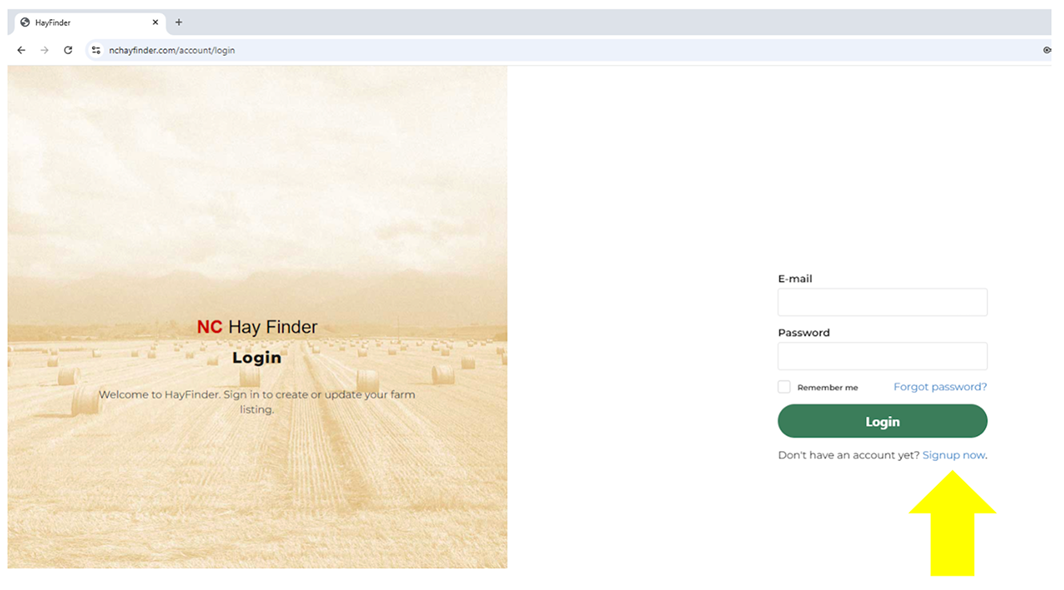
Click "Signup now"
-
4
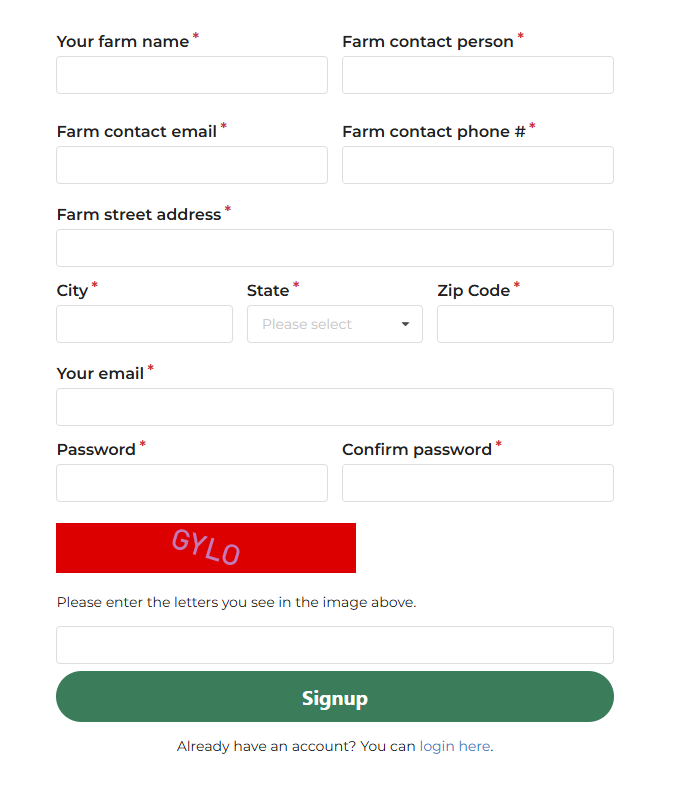
Enter the required information and click "Signup"
-
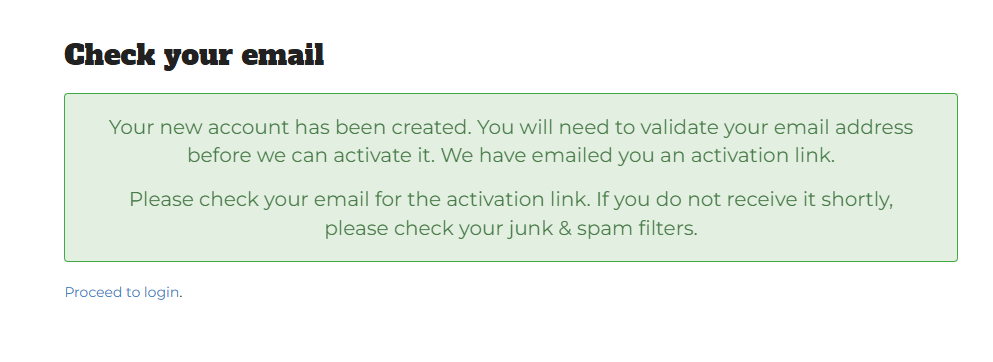
5
Check your email for the activation message
-
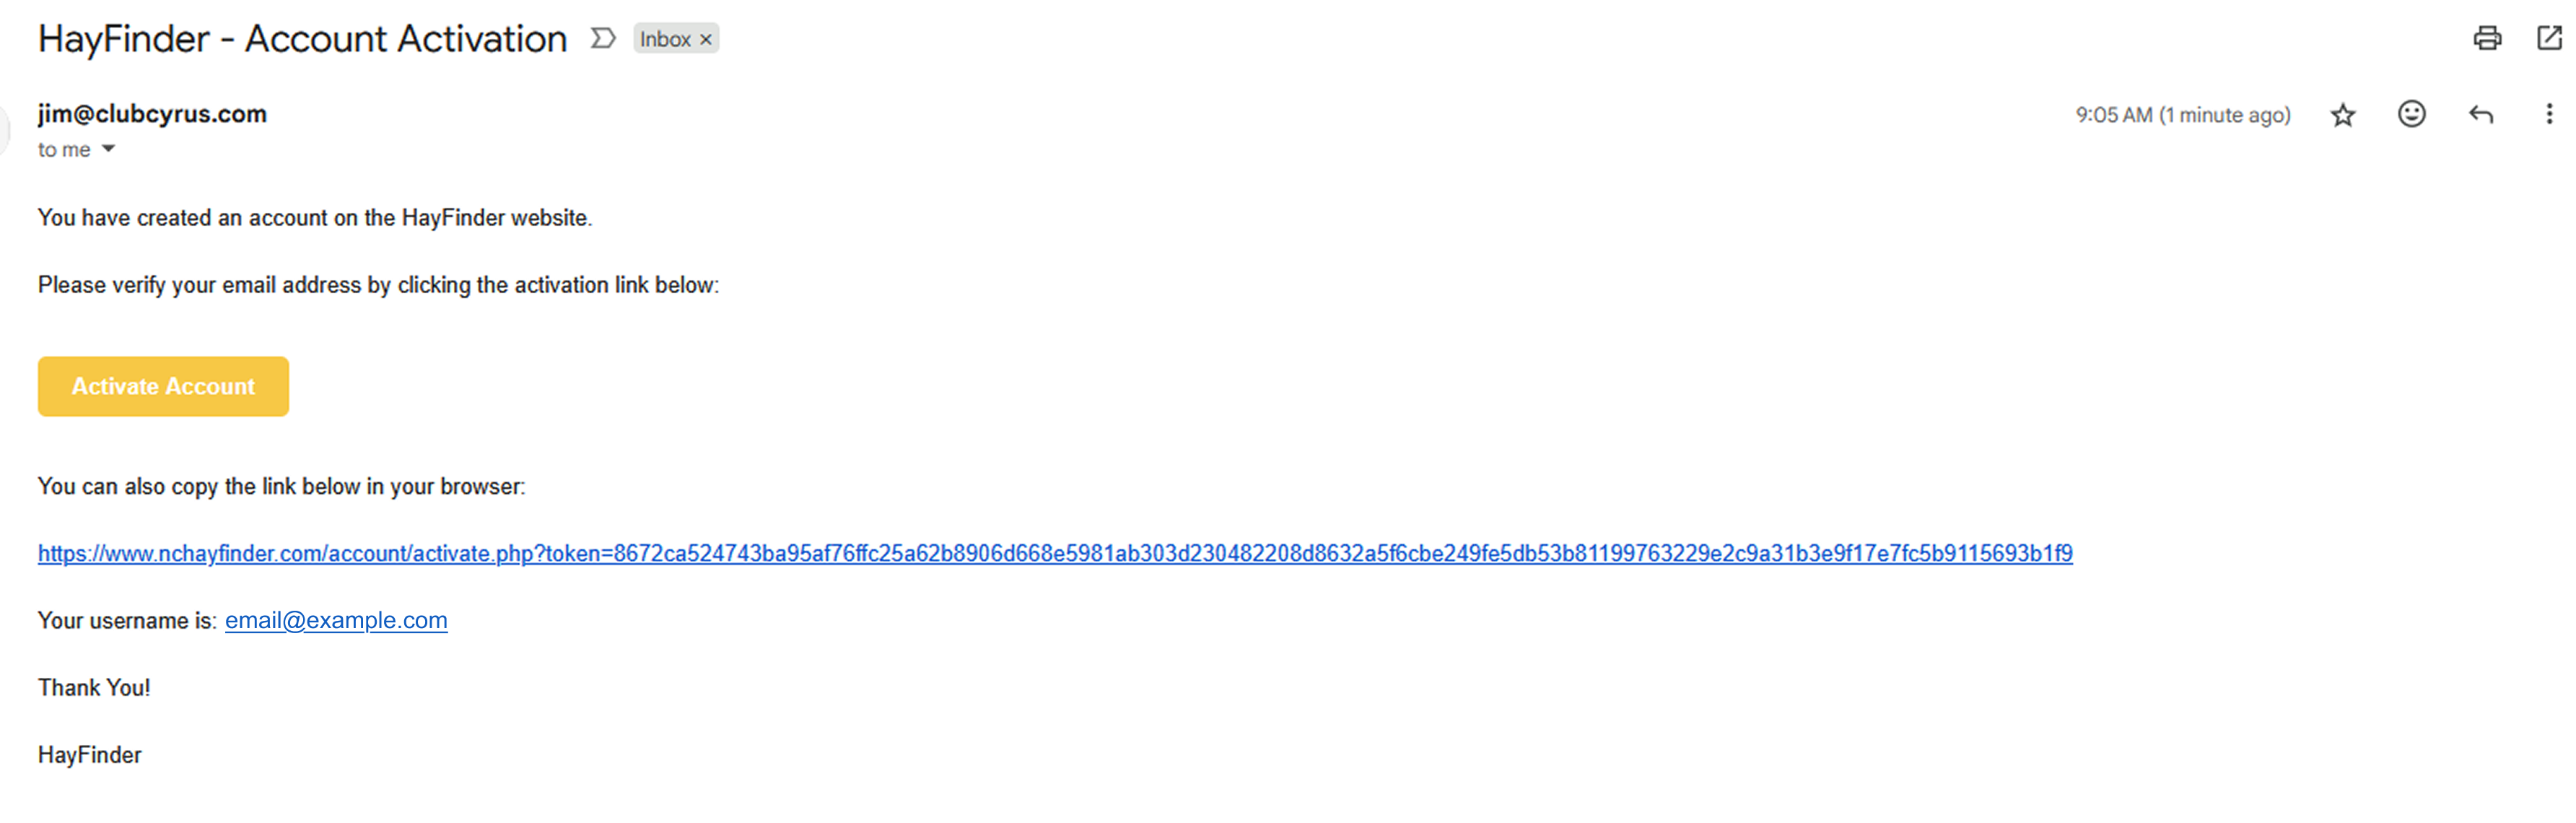
6
Email will be from “jim” with the subject “HayFinder - Account Activation”.
If you don’t receive the email, check your spam and/or junk folders.
-
7
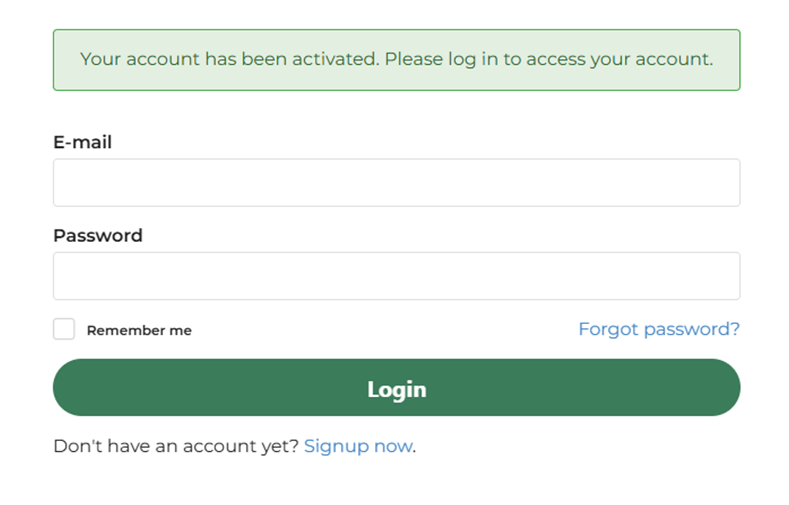
You must “Activate Account” by clicking on the button or copying and pasting the link into your web browser.
-
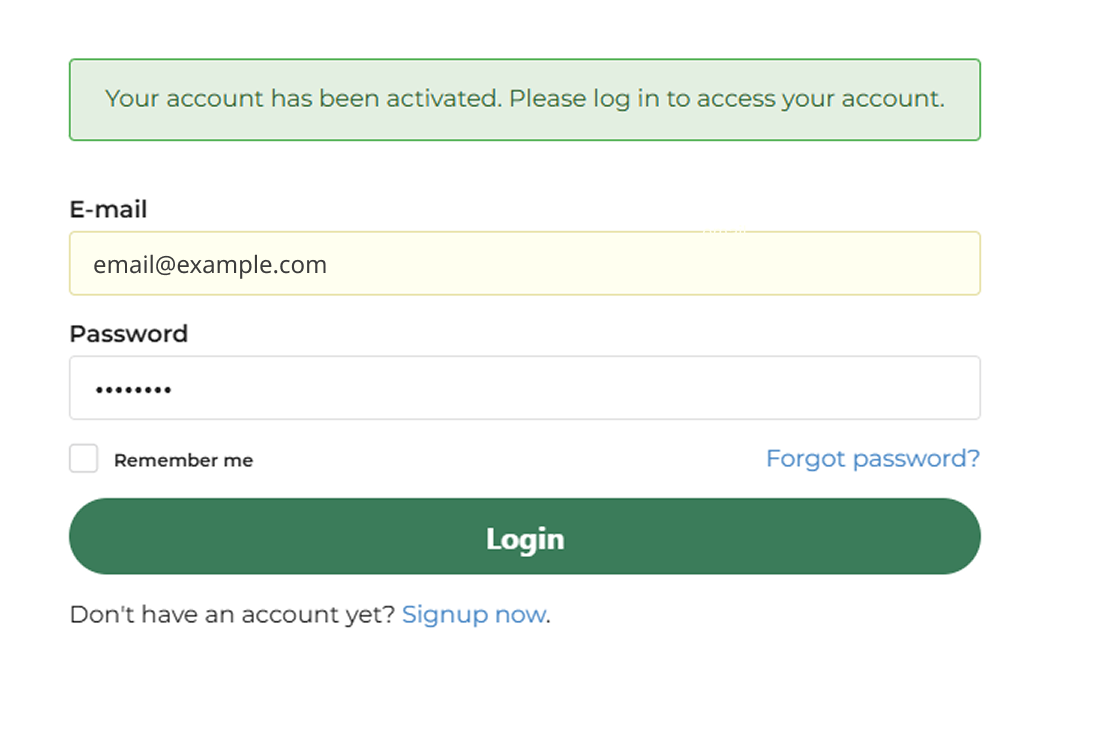
8
Log in with your email and password.
-
9
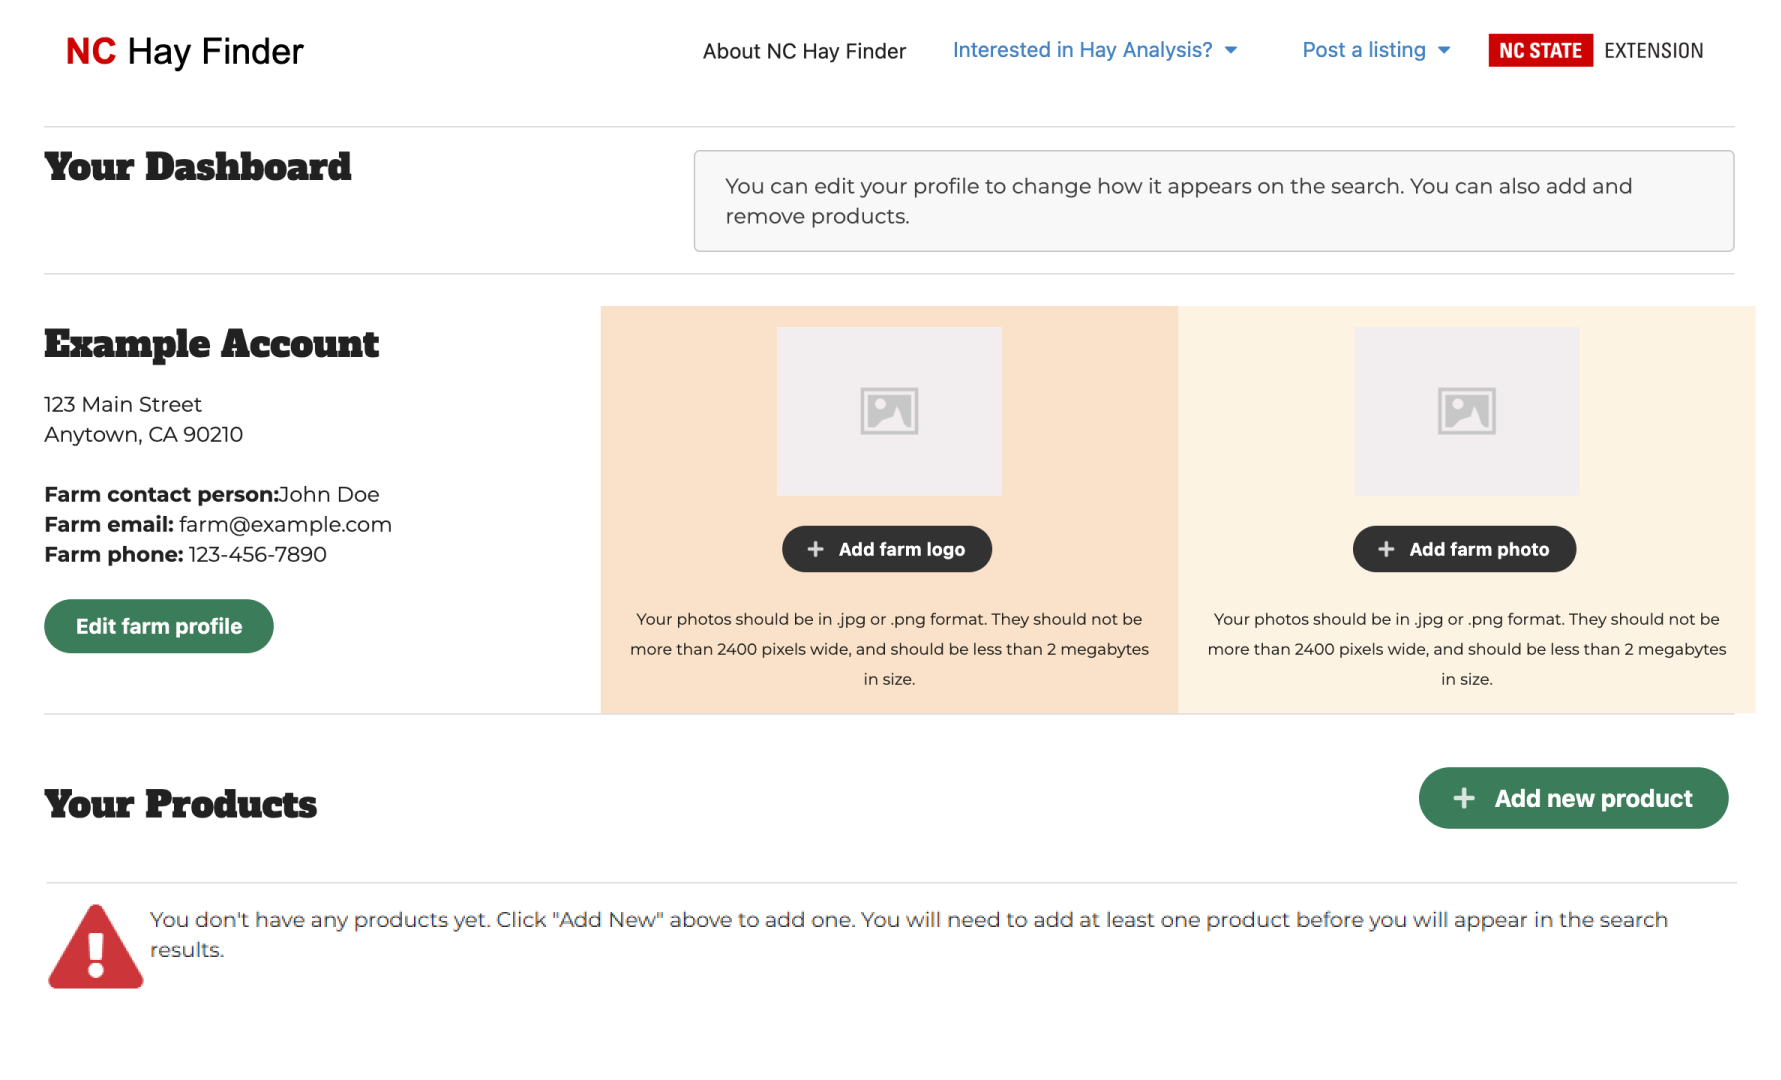
Add at least one product listing
Customers search for products (not farm profiles). If you don’t list at least one product, your farm won’t appear in search results.
-
10
You must add at least one products.
The way NC Hay Finder is designed, customers only see product listings and not the farm profile when they search. If you don't have at least one product listed, your profile won't be visible in a search.

-
11
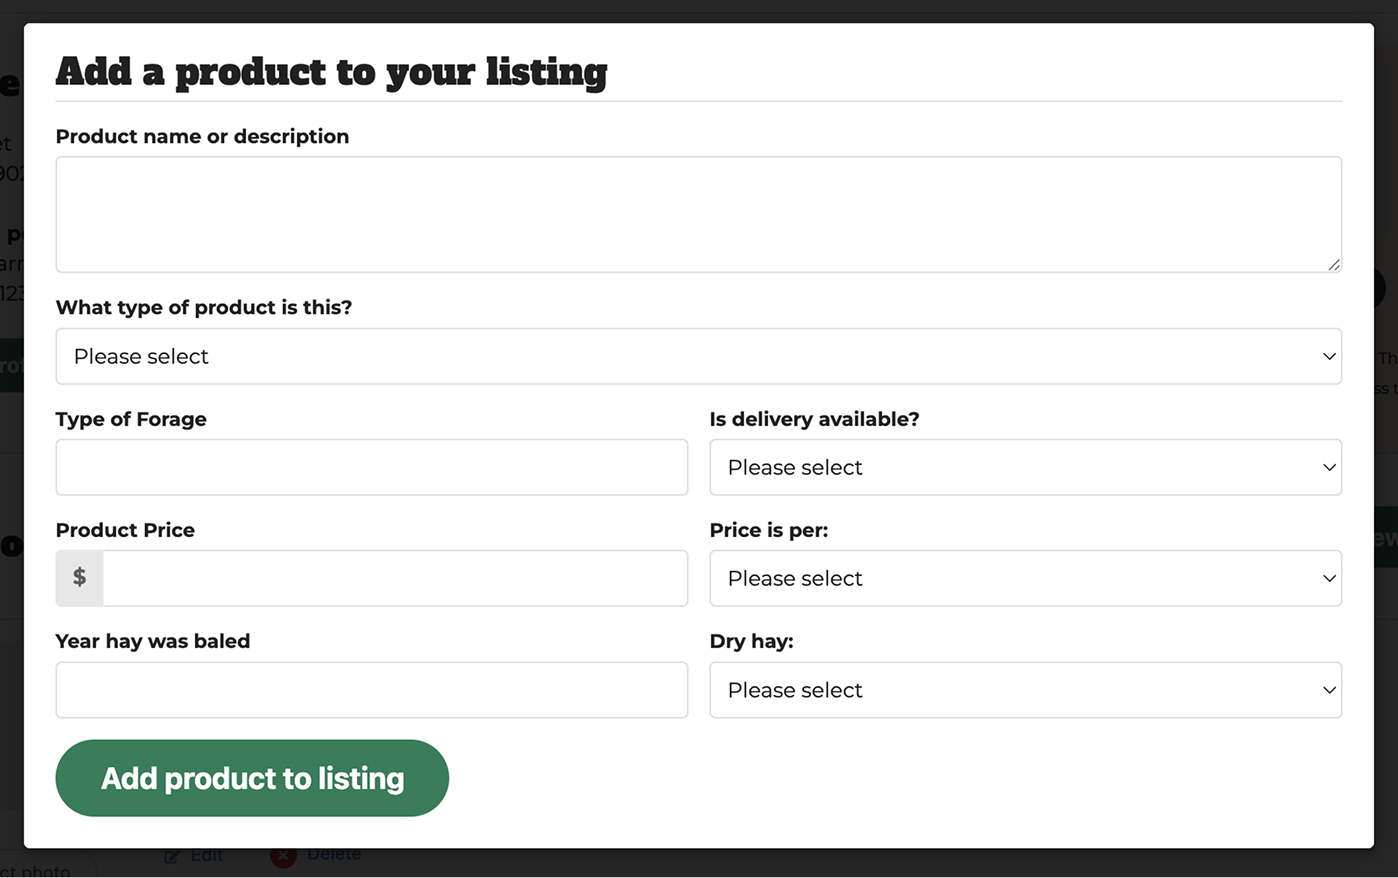
Entering a description of a product
Below is a listing of the available fields. Some are short answer, and some are dropdown. You can add as many products as you wish. For example, if you have last year’s hay that you are selling cheaper, create 2 product listings and separate the two:
- Product name or description
- What type of product is this? (Dropdown menu)
- Round Bales (< 1000 lbs)
- Round Bales (> 1000 lbs)
- Large Square Bales (> 100 lbs)
- Small Square Bales (< 100 lbs)
- Wrapped Haylage
- Type of forage
- Product price
- Year hay was baled
- Delivery available? (dropdown):
- Y
- N
- Price is per (dropdown):
- Bale
- Ton
- Dry hay (dropdown)
- Selected
-
12
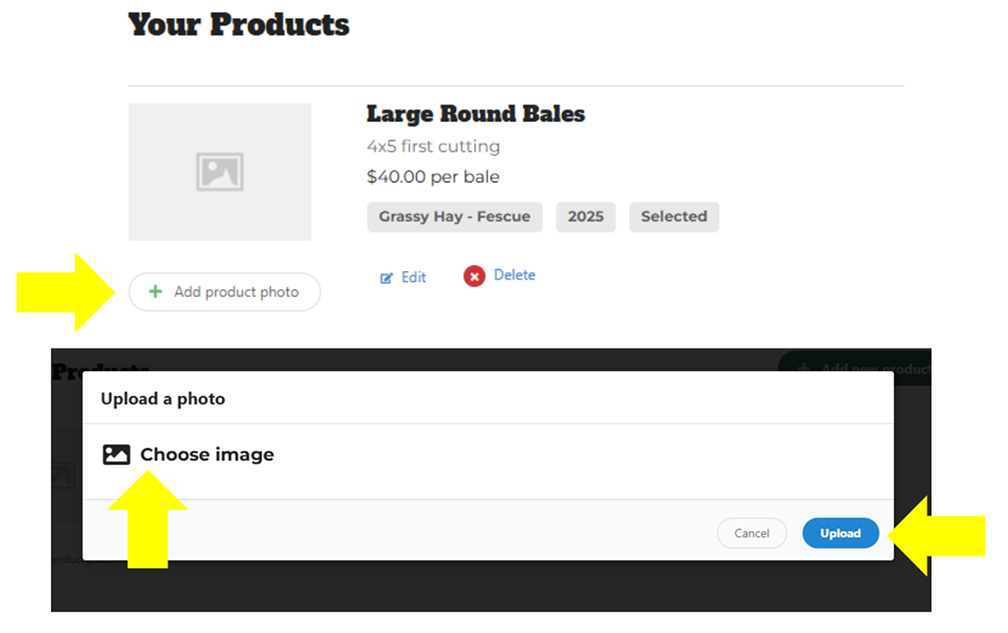
Click Add product to listing when finished
Then you can choose to upload a photo of the hay if you choose: 1) Add product photo → 2) Choose image → 3) Upload.
-
13
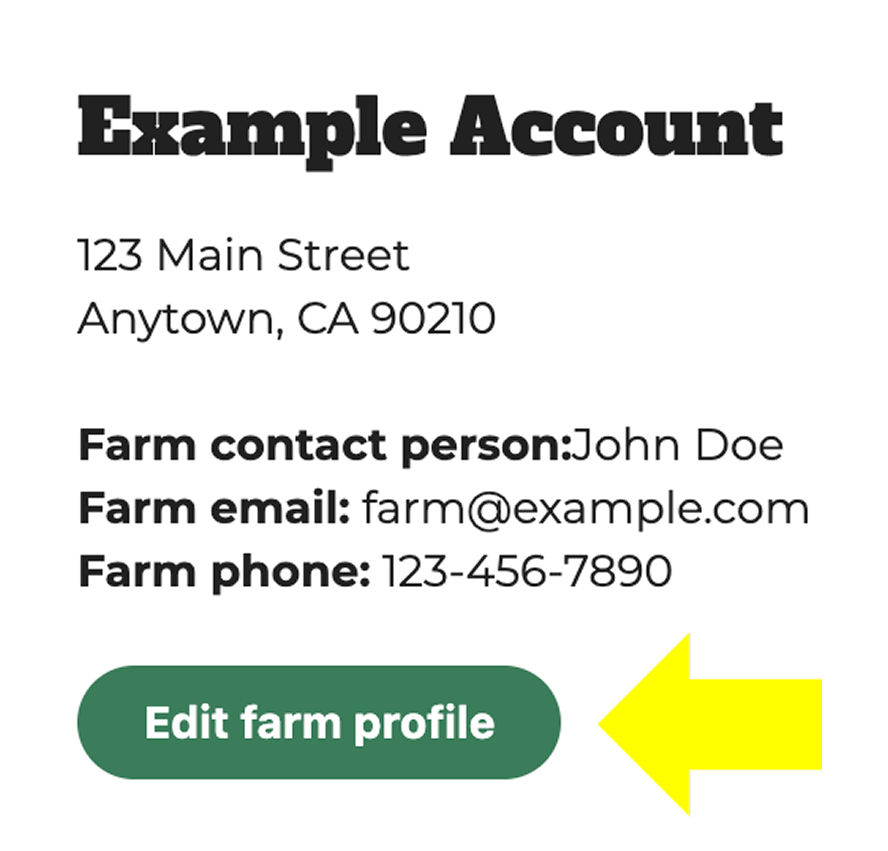
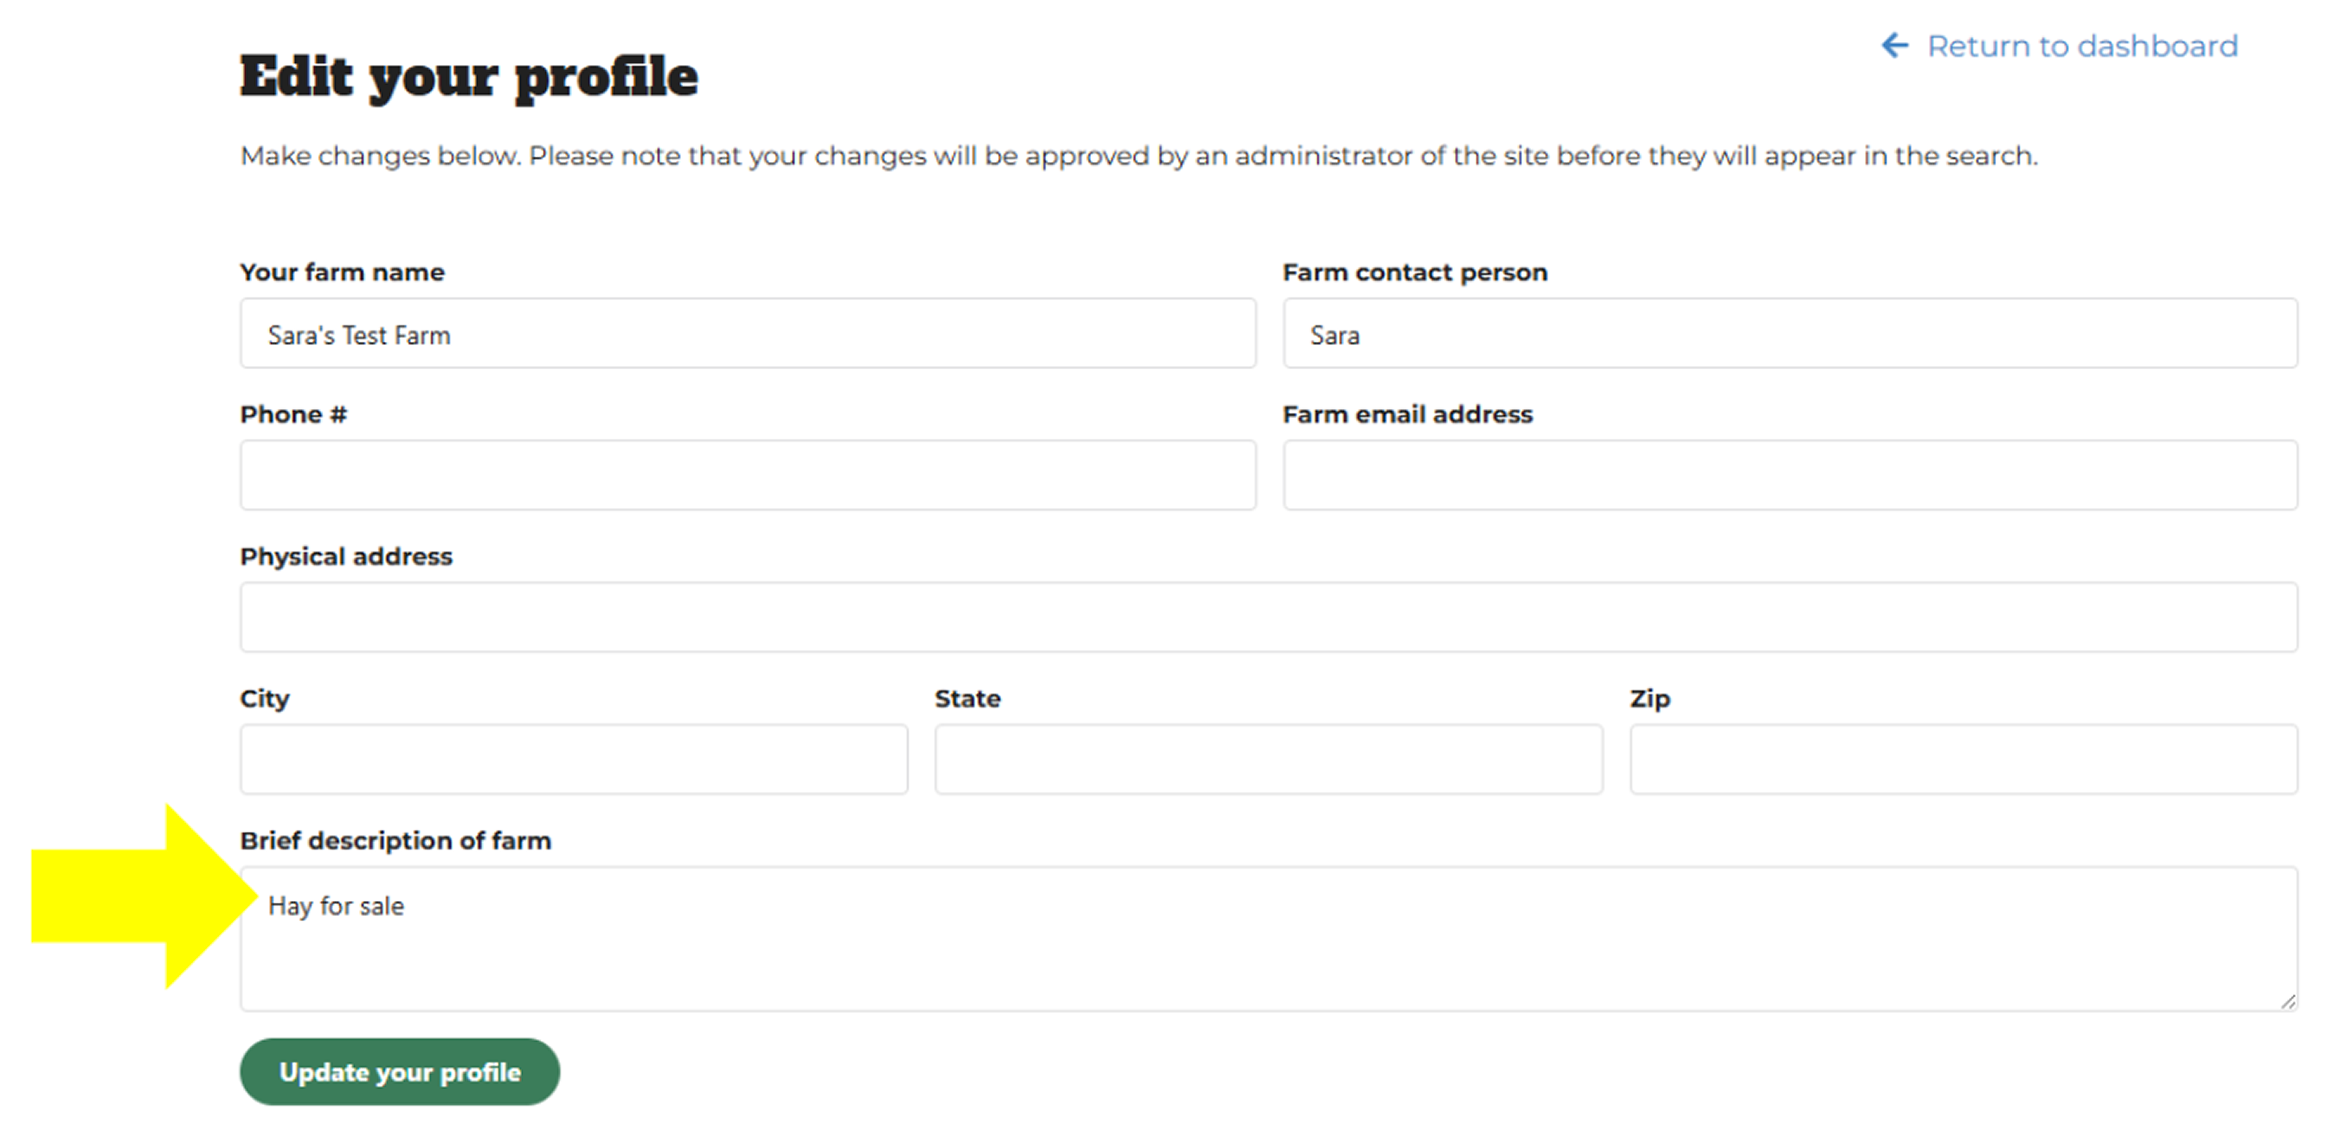
Edit your Farm Profile
-
14
Be sure all information is correct. Most importantly - there needs to be something in the “Brief description of farm” box. This could be something as simple as “Hay for sale”
-
15
Optional: You can upload farm logo and a farm photo if you wish.
